
The Executive Briefing Service retrieves data from a “read-only” account that you set up on the SQL Server that hosts your ConnectWise database. Here’s how to create the account on your SQL Server that EBS will use to retrieve your data.
1. Connect to your SQL Server using “SQL Server Management Studio” (SSMS). You can do this by logging on to your SQL Server server, or you can connect to it remotely from another machine. (SSMS is a tool provided by Microsoft for managing SQL Server).
2. Once you have signed in to SSMS, in the upper-left hand corner of the screen you’ll see an “explorer” window, with at least one item showing in the explorer tree. The top item represents your SQL Server SERVER. If it is not already expanded, expand it by clicking the ‘+’ just to the left of the icon to open the dependent items.
3. Under the now-expanded SERVER icon tree, click on the folder entitled “Security”:
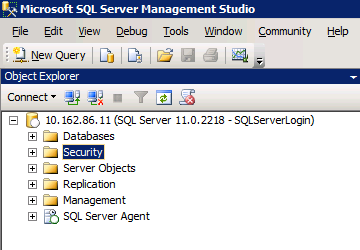
Click the SECURITY folder
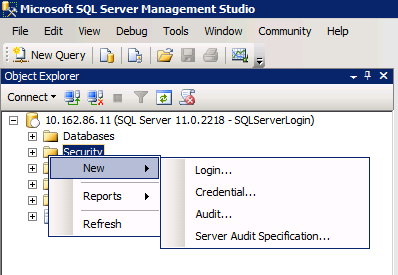
4. RIGHT-CLICK the SECURITY folder and select NEW, and then LOGIN…
5. Under the “Select a Page: GENERAL” area:
-
* Enter the login name that you wish to create
* Select “SQL SERVER AUTHENTICATION” via the radio buttons
* Enter and confirm the password for this account
* UN-CHECK the checkboxes for Password Policy, Expiration and Change (so they are NOT CHECKED)
* Under “Default database” (near the bottom of the screen), select the name of your ConnectWise database from the pop-up list of available databases
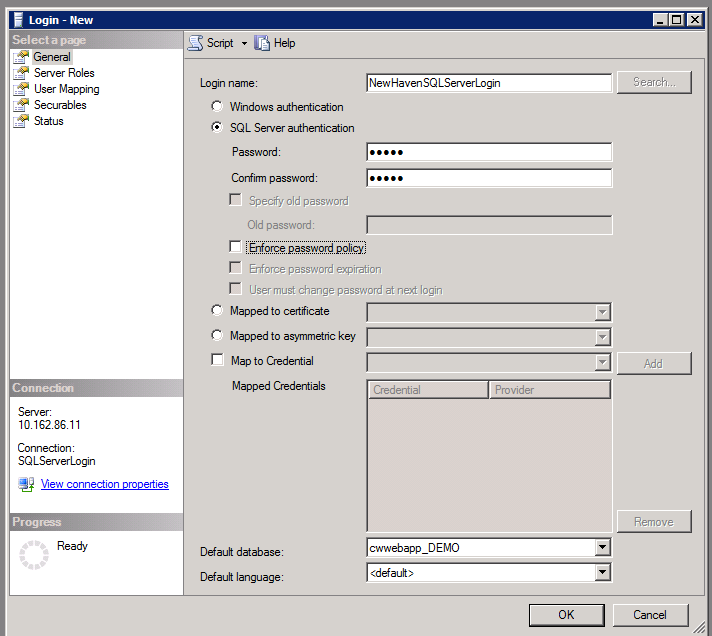
Enter Login Name for SQL SERVER Authentication (NOT WINDOWS SERVER AUTHENTICATION)
6. Under “Select a Page”, choose “Server Roles”, and set the server role to “Public”.
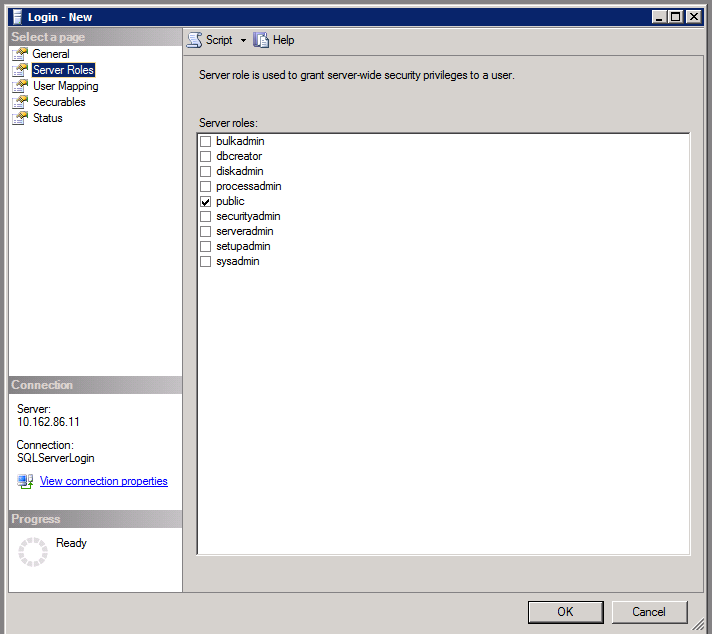
Set Server Role to PUBLIC
7. Under “Select a Page”, choose “User Mapping”, and click the “Map” checkbox next to the name of your ConnectWise database.

Click “Map” checkbox next to the name of your database
8. Under “Select a Page”, choose “Status”.
-
* Set “Permission to Connect” to “Grant”.
* Set “Login” to “Enabled”
* Click OKAY button
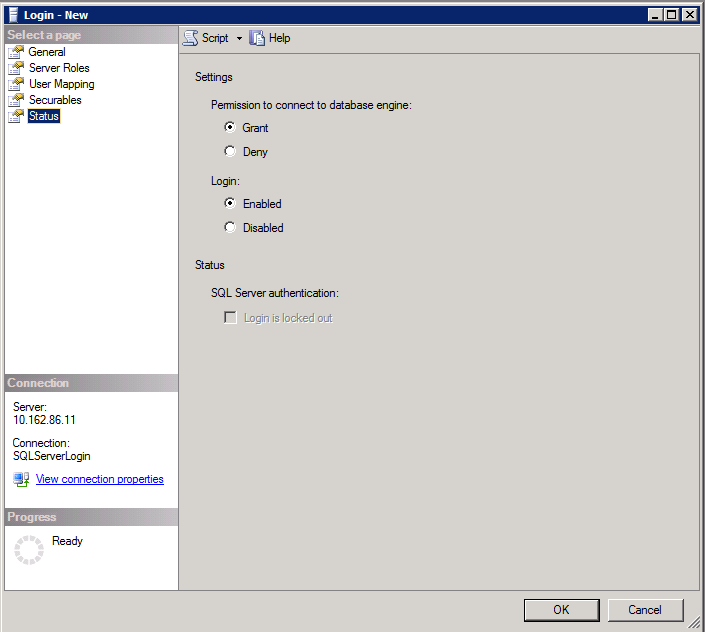
GRANT permission to connect and ENABLE login
9. Open the “Databases” folder in the Object Explorer (upper-left in SSMS window), and click the name of your ConnectWise database to select it.
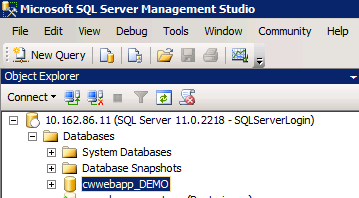
Select your ConnectWise Database
10. RIGHT-CLICK your ConnectWise database and select PROPERTIES.
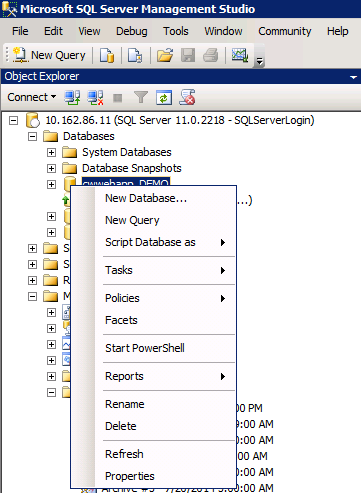
Right-click your ConnectWise database and select PROPERTIES
11. Click on PERMISSIONS (under “Select a Page”), then:
-
* Click the name of the new SQL Server login (the one you just created in the earlier step) in the upper-window
* In the lower window, scroll down to the CONNECT permission, and click the GRANT checkbox.
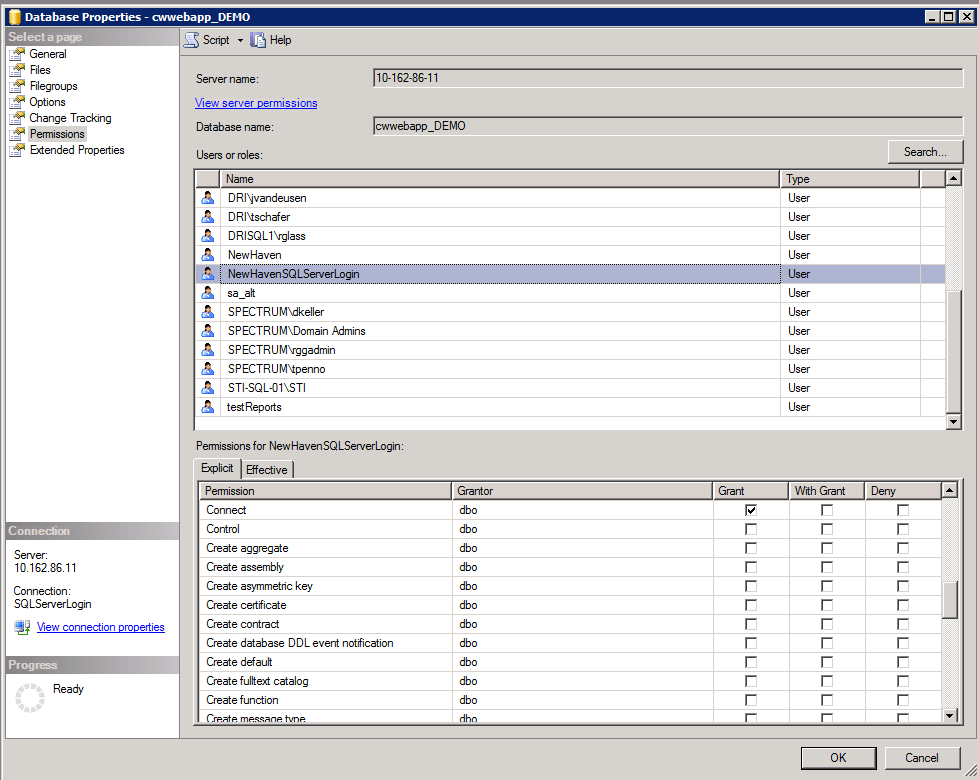
Under PERMISSIONS, click login name and grant permission to CONNECT
12. Scroll down to the EXECUTE permission and click the GRANT checkbox.
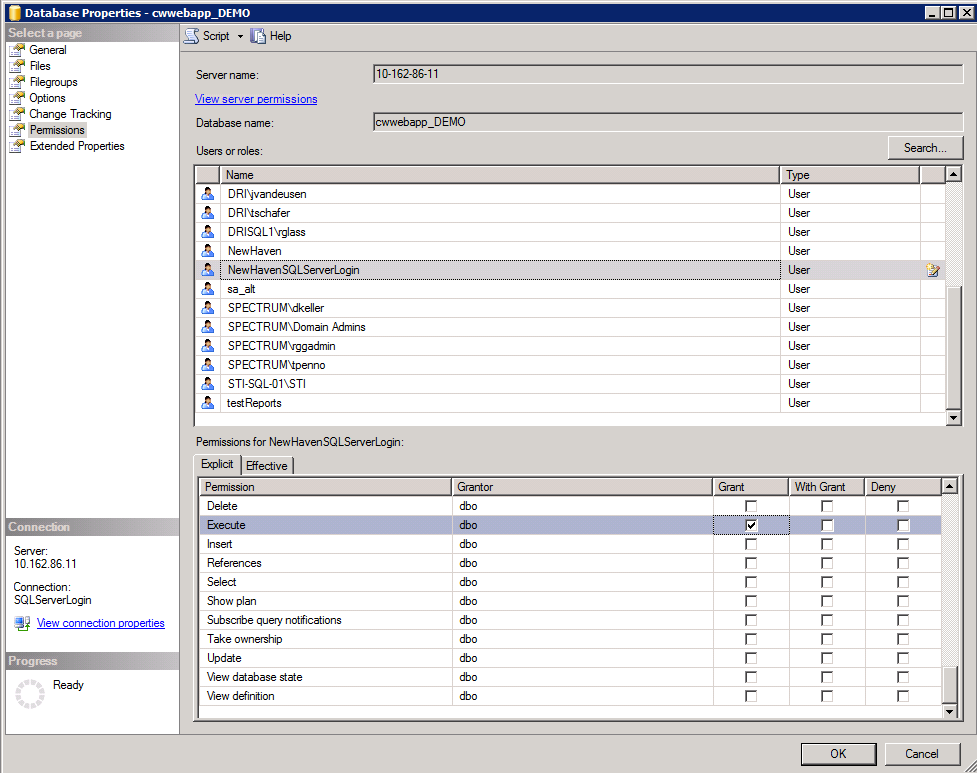
GRANT permission to EXECUTE Stored Procedures
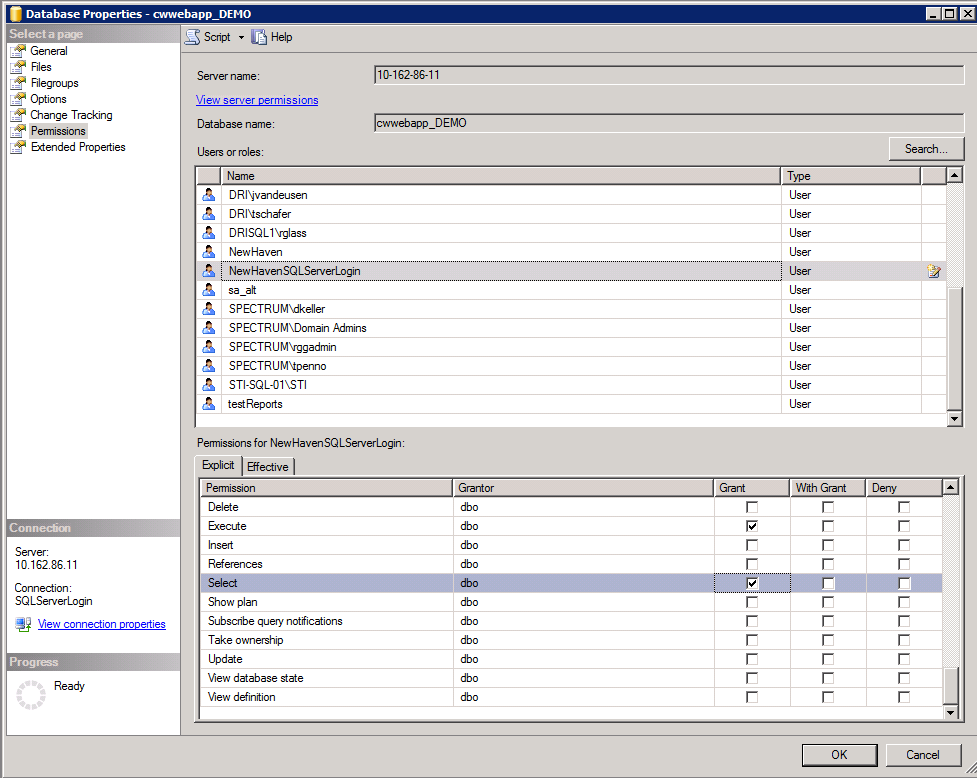
13. Scroll down to the SELECT permission (just 3-4 entries below EXECUTE). Click the GRANT checkbox on the SELECT permission line.
14. Click OKAY button, and you are done.
Still have questions? Send an e-mail to SETUP@NewHavenTech.com with your question.